Introduction
To begin working in DataJet, you will first need some data to work with, and that data will need to be on the DataJet server. This tutorial will take you through the process of downloading the DataJet demo data files, adding them to the server where DataJet is running and then using those files to create a sample project.
- If working on the "dj-demo" realm, the DJDemo2023 project will be on the server already.
- Your organisation may not allow you to upload data to the server in which case you will only be able to create the Demo project if the data has already been added to the server
- Speak to a database administrator if the demo data is not already on the system you are working on and you do not have the ability to upload data
Objective
This Tutorial shows how to:
- Download the DataJet Small Demo Database from the DataJet Download server (note - other data can be used in place of the DataJet demo data if you have it)
- Upload the demo data files to the active DataJet realm
- Extract the data, script and definition files
- Run the script and create a demo project and reports
Key Techniques that will be covered
- Accessing the download server
- Uploading data to the DataJet server
- Decompressing data files
- Downloading from the DataJet Server
- Using Script Editor to run a complete script
- Opening and viewing a project
Step 1 - Download Demo Data
Go to DataJet download server and download djdemo2023.rar:
https://download.datajet.app/data/djdemo2023

(store in the usual downloads location)
Step 2 - Login to DataJet
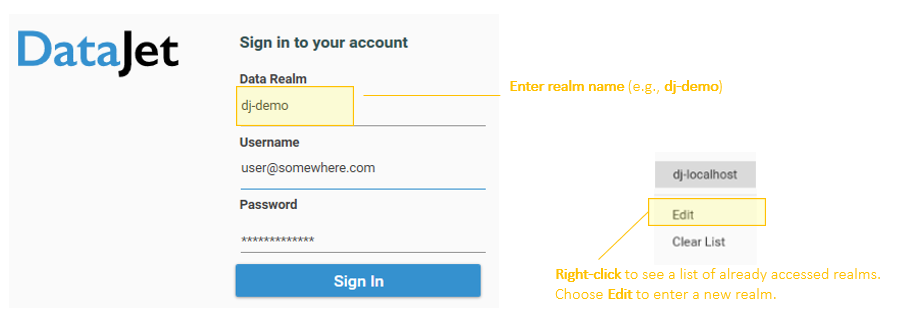
Run DataJetExplorer.exe to bring up the login screen. Enter or select a realm name, enter username, and provide password.
- DataJet realm name
- Username
- Password
- https://download.datajet.app/desktop
See Installing DataJet Desktop for further details
Click Sign In to connect to the selected DataJet realm. The DataJet Desktop Application will be opened:
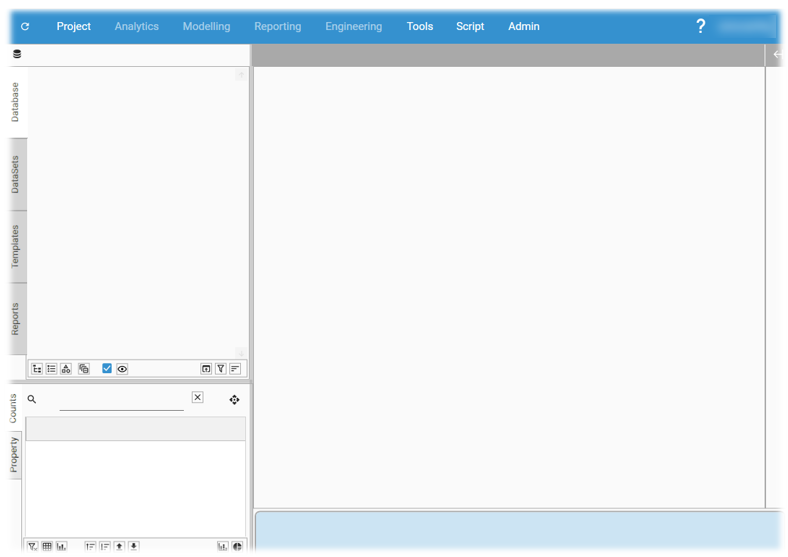
(For more details on logging in to DataJet, see Logging in to DataJet Desktop)
Step 3 - Uploading and Extracting data
Open Remote File Manager
Go to Admin | Remote Files and select the Data Source Folder: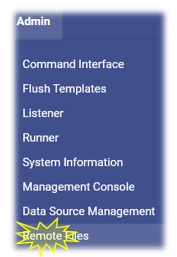
Go to Data Source Folder
Check for existence of sub-folder DJDemo2023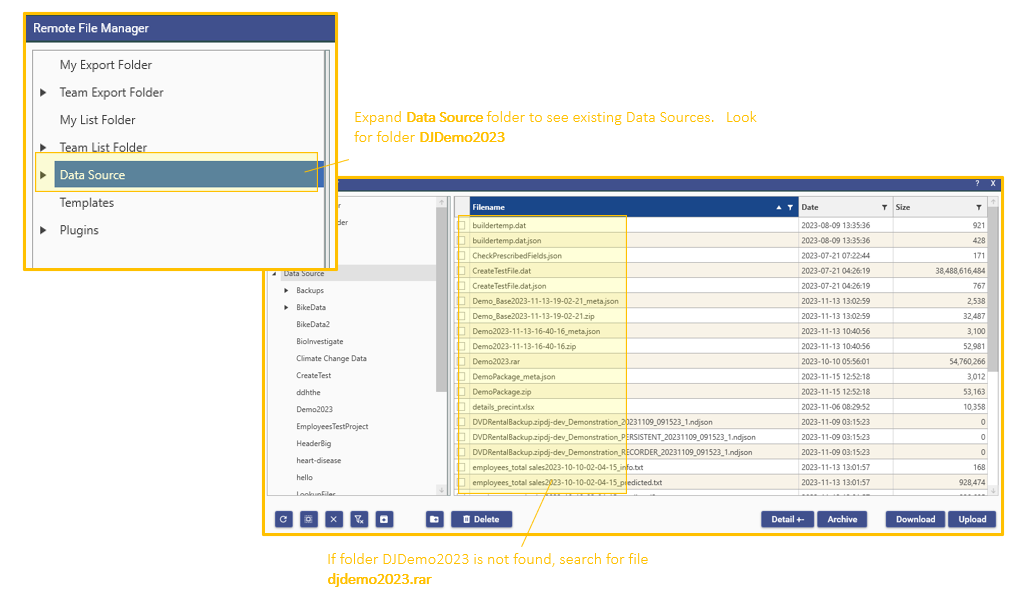
Verify Files are on the Server
If the DJDemo2023 folder already exists, go to Step 4.
If file djdemo2023.rar already exists in the Data Source folder, go to Step 4.
If the DJDemo2023 folder does not already exist, and the file djdemo2023.rar is not in the Data Source folder, upload the djdemo2023.rar file by selecting the Data Source folder and choosing "Upload":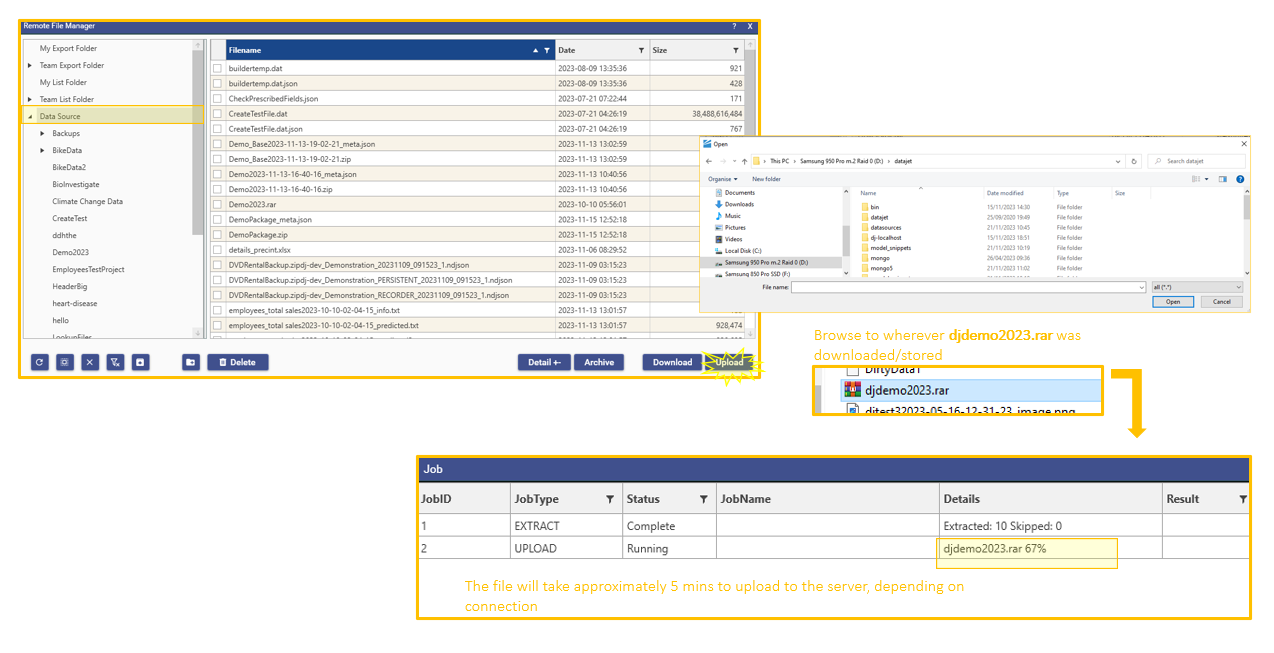
Refresh Remote File manager
Once the upload is complete (when the status in the popup Job Window changes from "Running" to "Complete"), close the Job Window and press Refresh: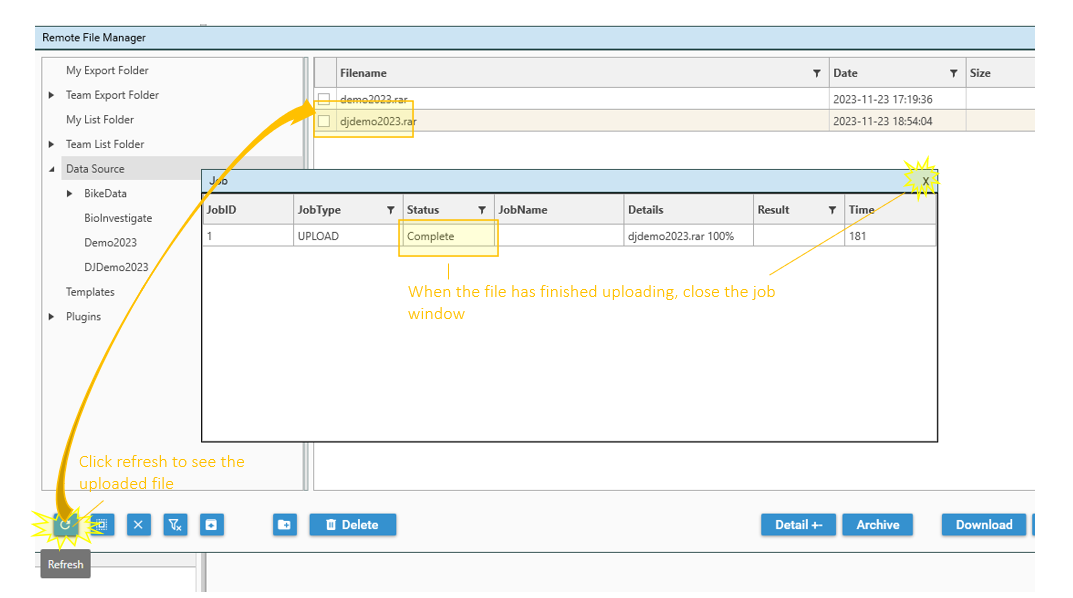
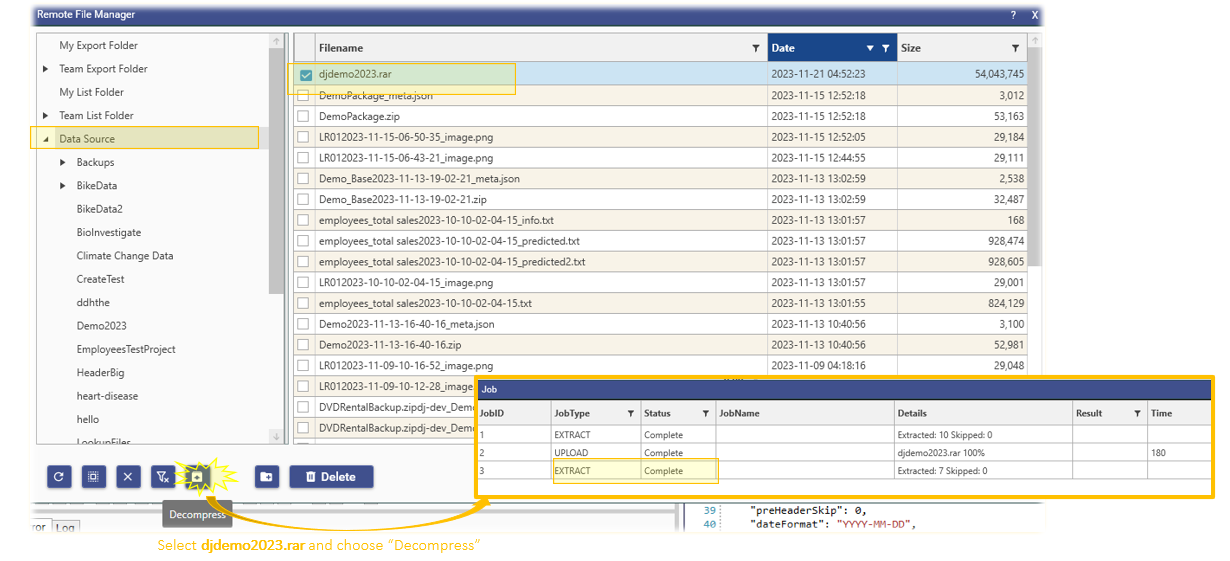
Unpack the Demo Data Files
Decompress the file djdemo2023.rar into folder DJDemo2023. To do this:
- Select the checkbox next to the file djdemo2023.rar
- Click the "Decompress" icon
- When the "over-write existing files?" message is displayed, click yes.
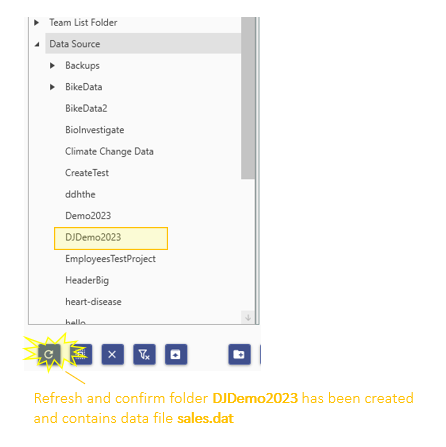
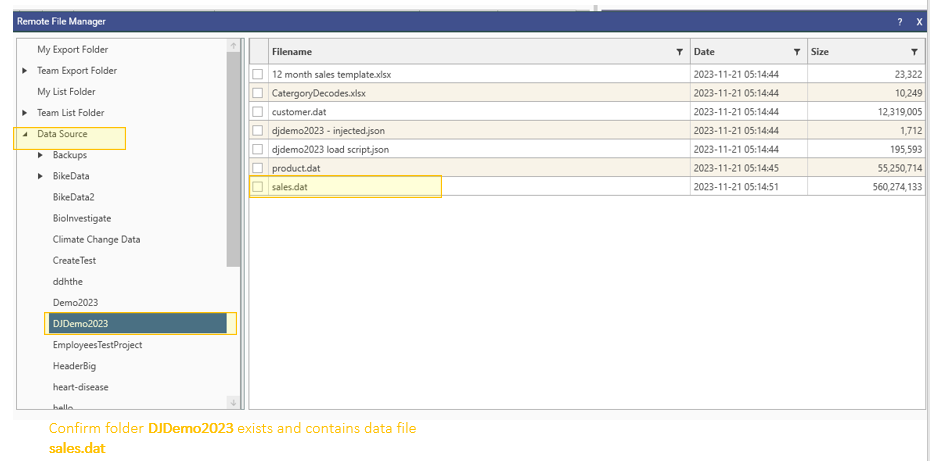
Step 4 - Check Data Files are on the Server
Verify Demo package contents
Go to Admin | Remote Files | Data Source
Go to sub-folder DJDemo2023 and verify it contains the following files:
- sales.dat
- customer.dat
- product.dat
- CategoryDecodes.xlsx
- 12 month sales template.xlsx
- djdemo2023 load script.json
- djdemo2023 - injected.json
- RFM Groups.xlsx
Step 5 - Download and Run Demo Script
This step shows how to download the demo script shipped as part of the DjDemo2023 project from where it has been unpacked on the DataJet server.
Once this script file has been downloaded to the local machine, we will then use Script Editor to open it and run it.
Download the script
Download the script by
- going to Admin | Remote Files | Data Source | DJDemo2023,
- selecting/checking djdemo2023 load script.json
- selecting "download"
- download the file to wherever local scripts will be stored.

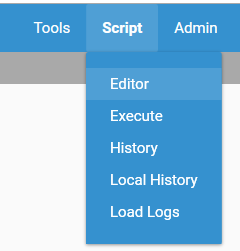
Open Script Editor
Open Script Editor by going to Script | Editor:
The Script Editor Workspace will open:
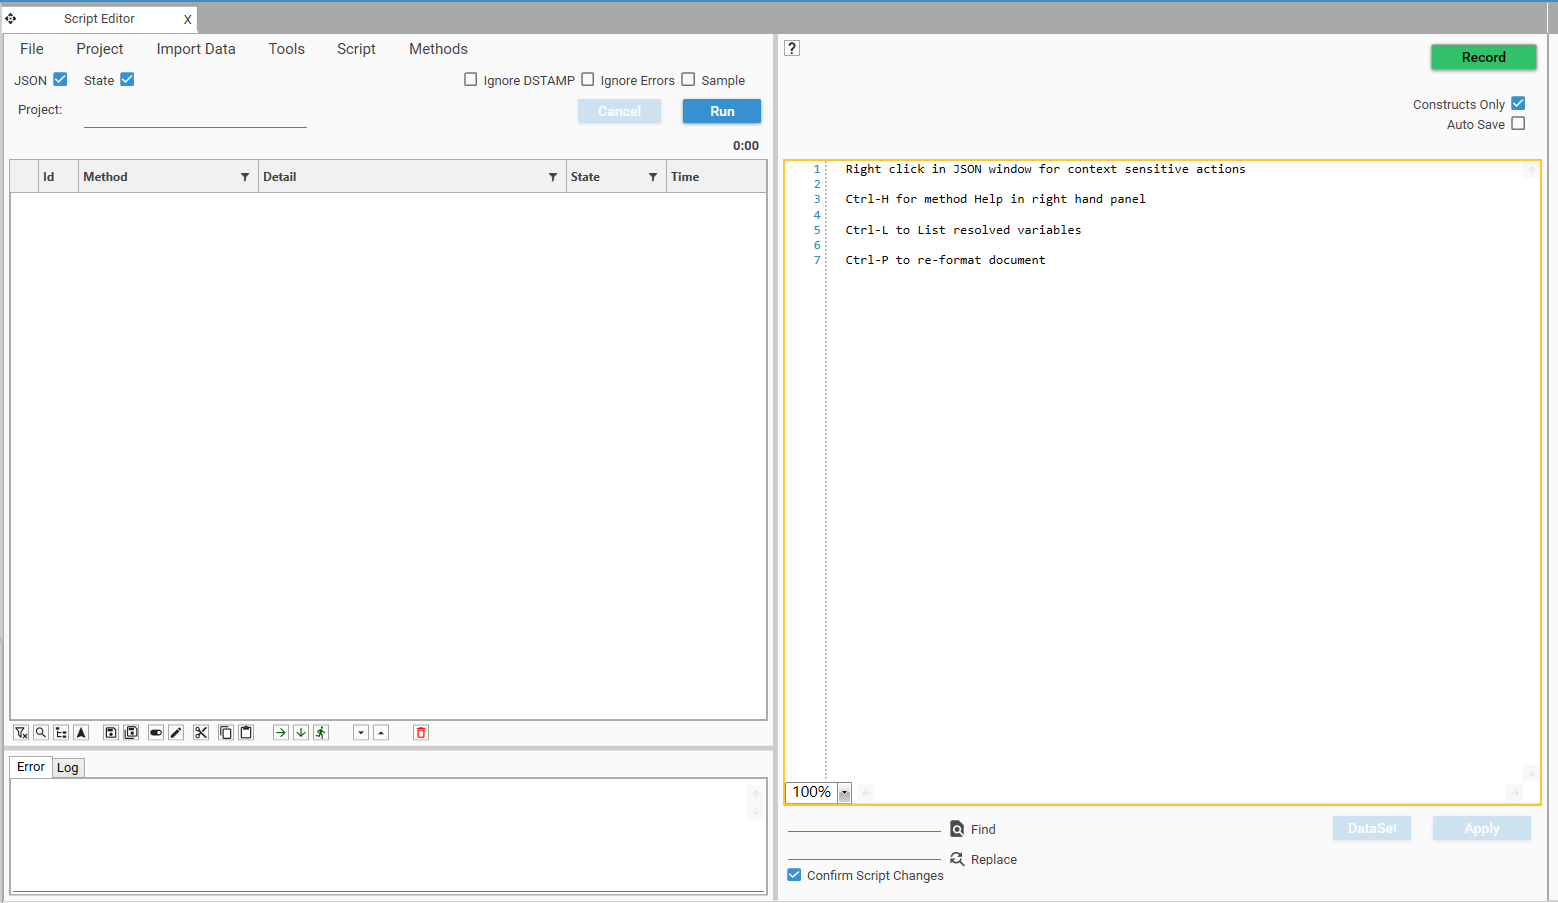
Open Script
Open the demo script file by going to File | Open and browsing to wherever the script file djdemo2023 load script.json was just downloaded.

The file will be displayed in the Script Editor window.
Run the Script
Verify that the project name is correct (it is possible to choose a name other than DJDemo2023 if required) and click Run: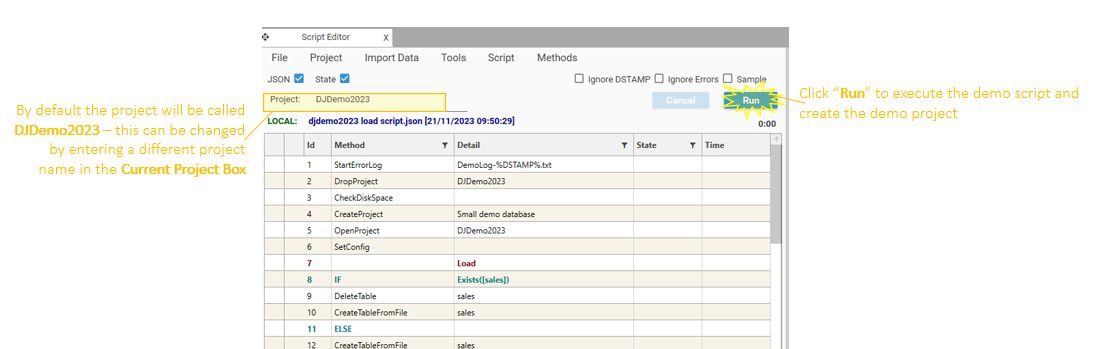
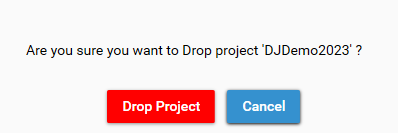
When the script executes, it will verify that project "DJDemo2023" (or whichever project name has been selected) should be dropped. Click Drop Project:
If this happens in error, speak to a system adminstrator for details of how to retrieve the original project
As the script executes, the Method Window will update with progress: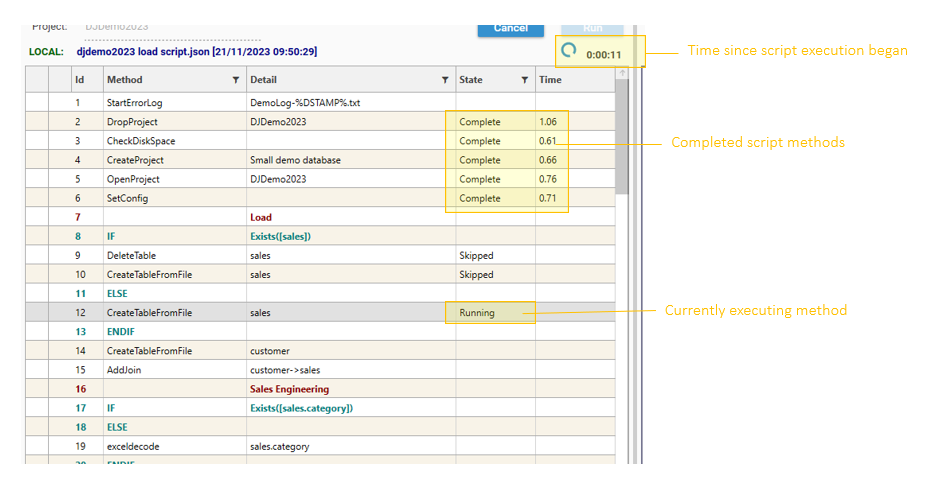
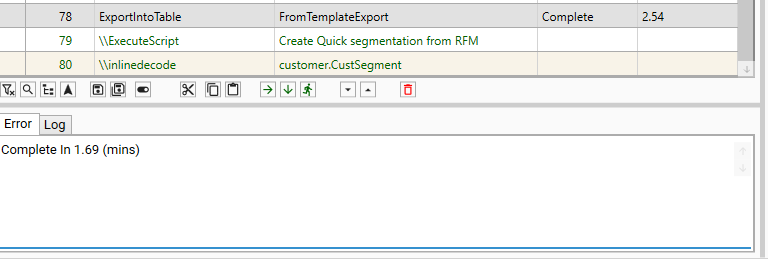
When the script has completed, the final execution time will be displayed in the Output Window:
Step 6 - Accessing the Demo Project
To access the project that has been created by the script, go to Projects | Open and select the project DJDemo2023:
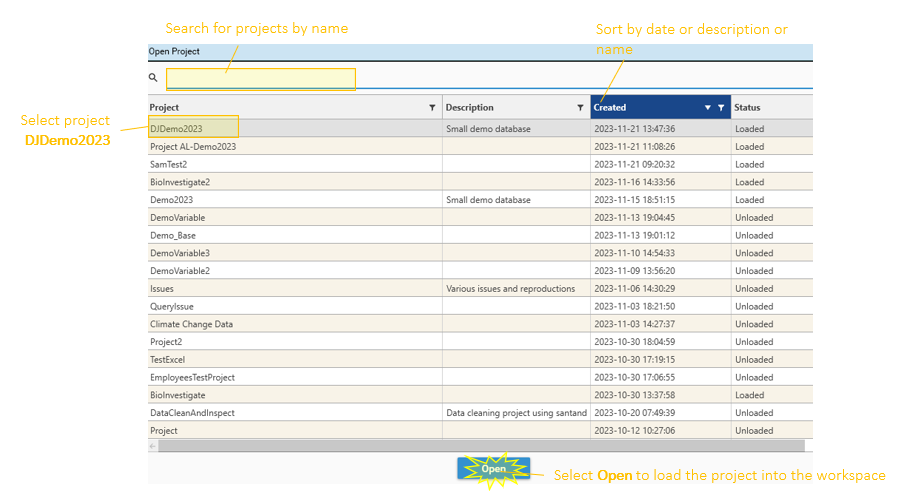
DJDemo2023 will load into the project workspace:
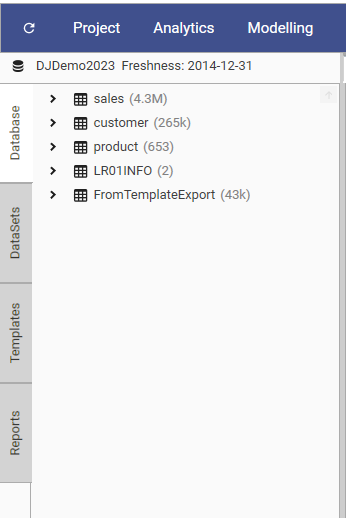
The project is now ready for exploration. See Instant Insights for tips on how to begin exploring and analyzing data.