- The user is logged in to an active DataJet realm that contains the DJDemo2023 data (or data arranged in a similar structure)
- Demo Data (or data in a similar structure) has been loaded into a project - see Step 2 - Create Project and Load Data if this has not yet been done.
- If working on an existing data structure that matches the DJDemo2023 schema, you can skip this step and go to Step 4 - Prepare Data for Reporting
Approach
Once the transactions table is loaded, customer data is loaded and the two tables joined. The sales data is augmented with product information.
This article shows how to:
- Import a delimited file
- Join tables
- Transfer/Copy data from one joined table to another
- Delete a temporary table
- Create a key table from another table
Key Techniques
The following functional areas are introduced by this step:
- Script Editor
- Load File Dialog
- File Selection Dialog
- Joins Dialog
- Copy Down
- Delete Table
- Make Key Table Dialog
Video Tutorial
Importing Data Using the Script Editor
Import customer data
So far in this series we have loaded sales (or transaction) data from a delimited file. The next step is to import the associated customer data.
To do this we will use the script editor - import file method.
Go to Script Editor | Import Data | Delimited File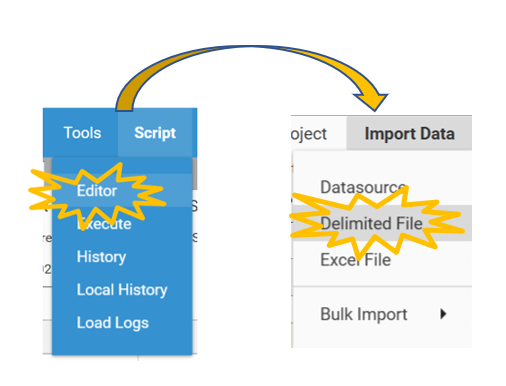
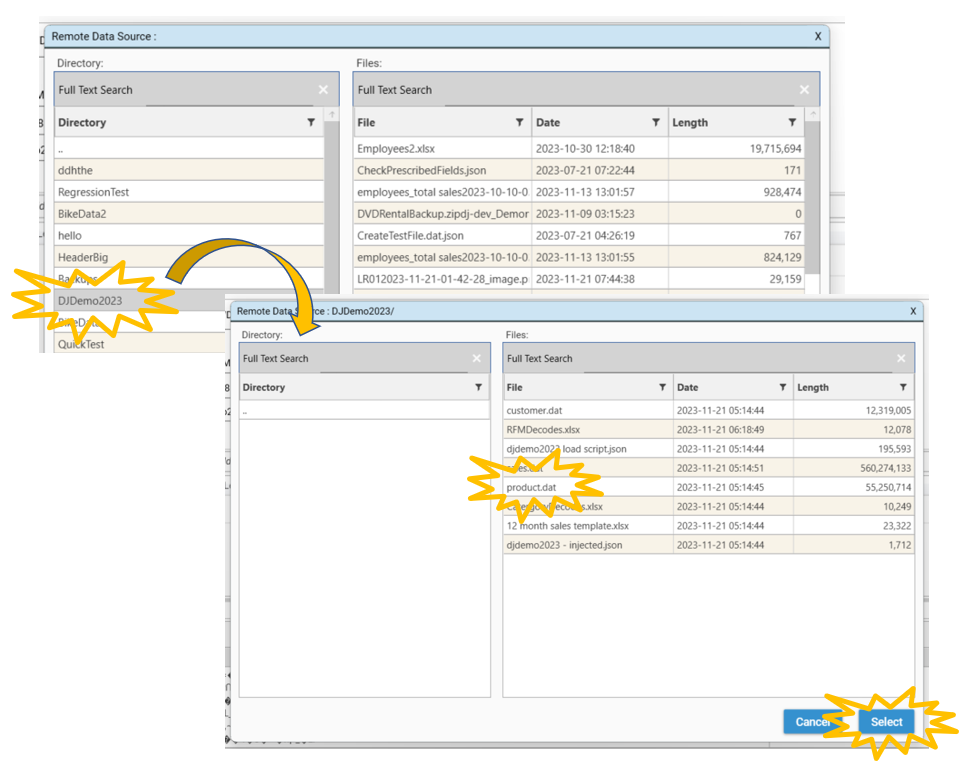
Select a file to import by clicking the file select icon (on the right-hand side of the page) to bring up the file selection dialog.
Select DJDemo2023/customer.dat file to load and select Open/Select.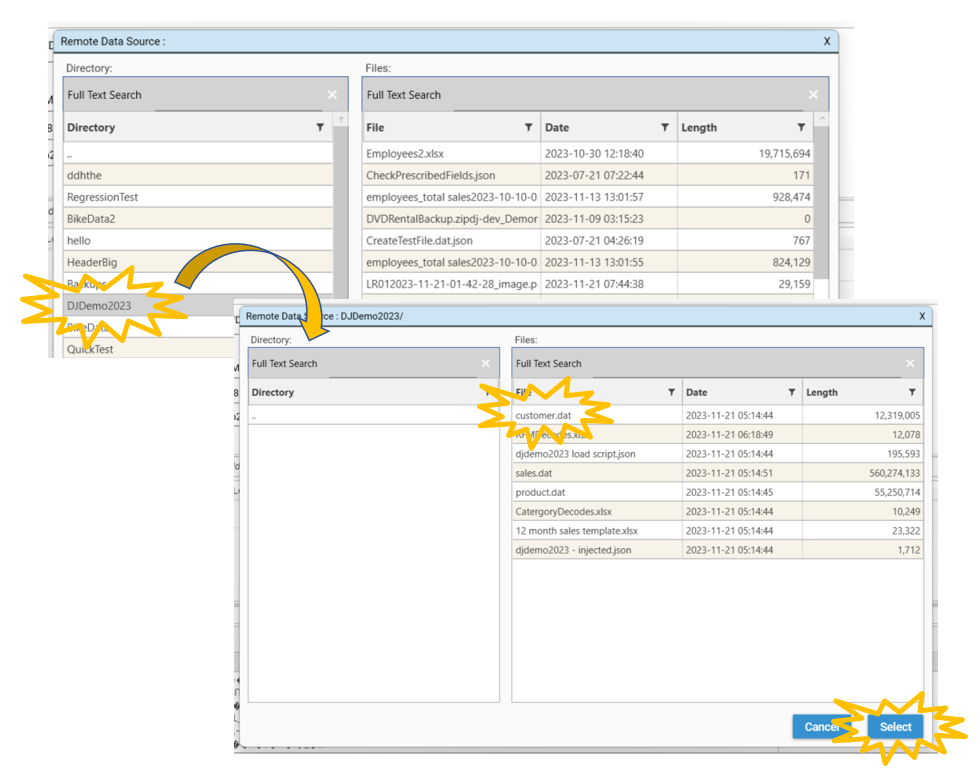
After confirming data types are specified for all fields in the file, select Save from the Delimited File Importer dialog
Click Run. The data will load, and the customer data will be visible in the Database Explorer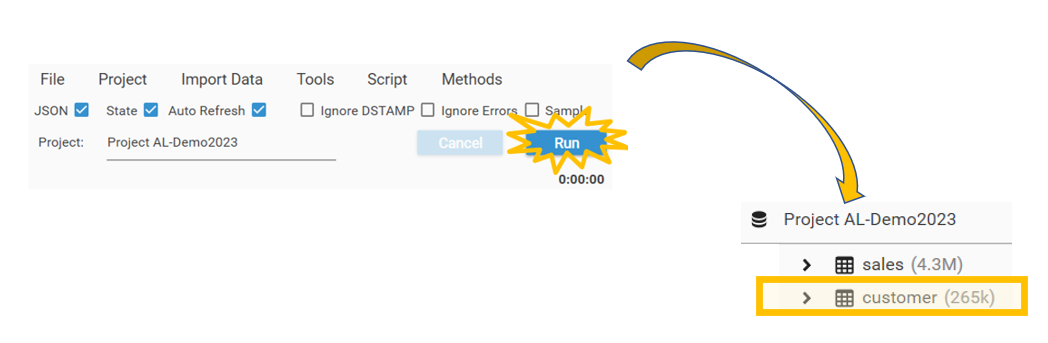
Import tproduct data
The tproduct data also needs to be imported. To do this we will use script editor again:
- Go to Script Editor | Import Data | Delimited File
- Select a file to import by clicking the file select icon (on the right-hand side of the page) to bring up the file selection dialog.
- Select DJDemo2023/product.dat file to load and select Open/Select.
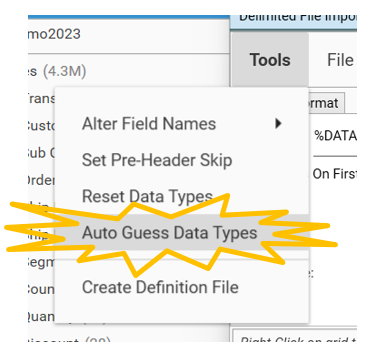
- The "Guess Data Types for SKIPPED fields?" message may not appear, in which case select Tools | Auto-guess Data types from the importer dialog menu.
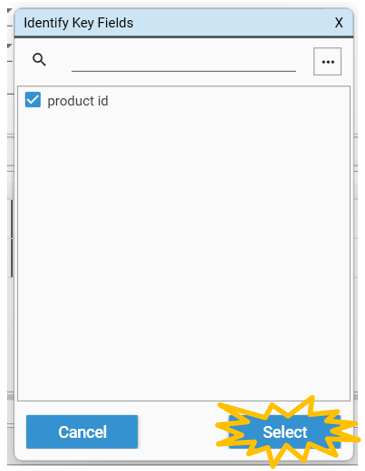
- If potential continuous fields are detected, the "Identify Key Fields" dialog will be displayed - use the option button to help select fields which should be loaded as continuous.
- Name the table "tproduct" - (this is a temporary table, hence prefixing the table name with t)
- Then select Save from the Delimited File Importer dialog.
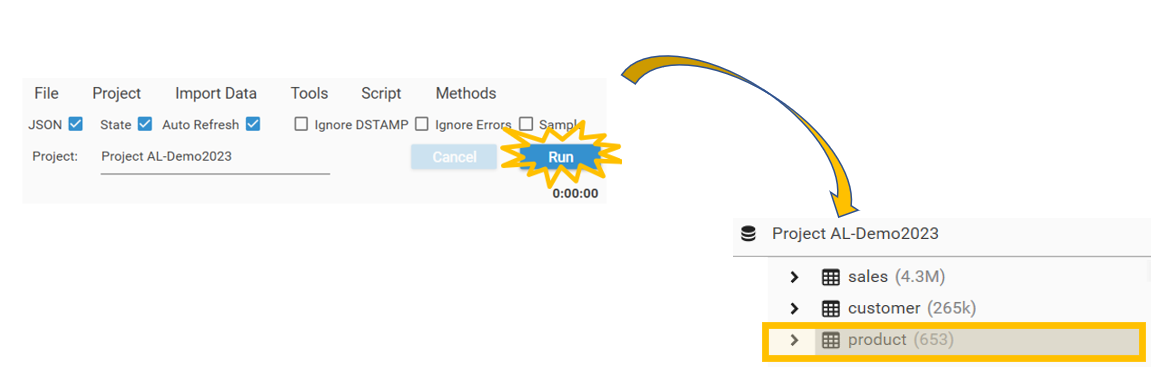
- Click Run. The data will load, and the tproduct data will be visible in the Database Explorer.
Joining Tables
Once the sales, customer and tproduct tables have been loaded, the next step is to join the tables. We will begin by joining the customer table to the sales table.
Available Methods
The following methods are available for joining data:
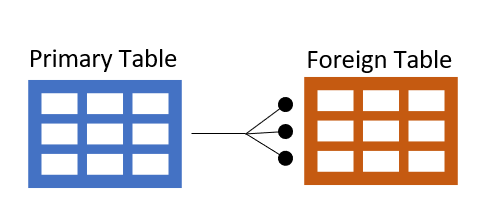
- 'Drag and Drop'. Join a table by dragging the primary key in the primary table and dropping it onto the foreign key in the foreign table
- Join Dialog. Drag and drop primary key and foreign key from the Database Explorer onto the Engineering | Joins dialog
- AddJoin Method. Select Script Editor | Methods | Data Model | AddJoin and add the AddJoin method to a script
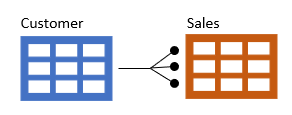
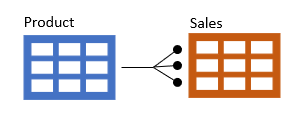
Joining Customer and Sales table
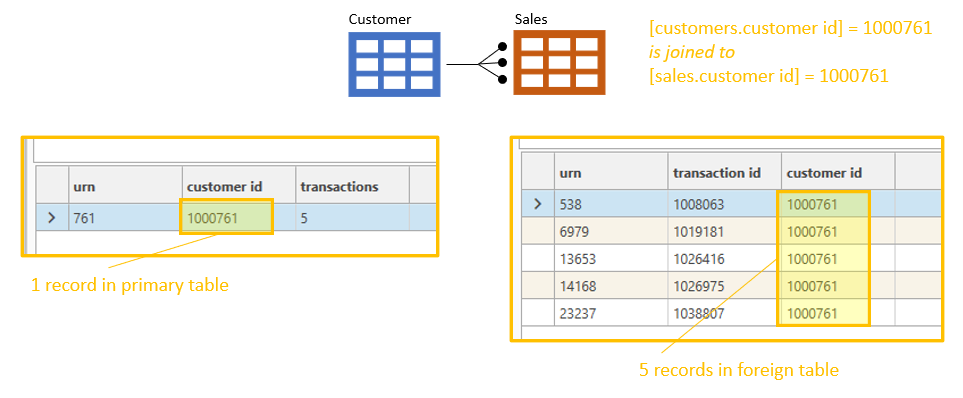
In our example customer id is the primary key on the primary table (customer table) and customer id is also the foreign key on the foreign table (sales table). So we will drag and drop the customer.customer id onto sales.customer id.
If it's valid for the customer ids to join (i .e. if the tables are not already linked and if the data types match), then an option to join the two tables will come up and it can be selected.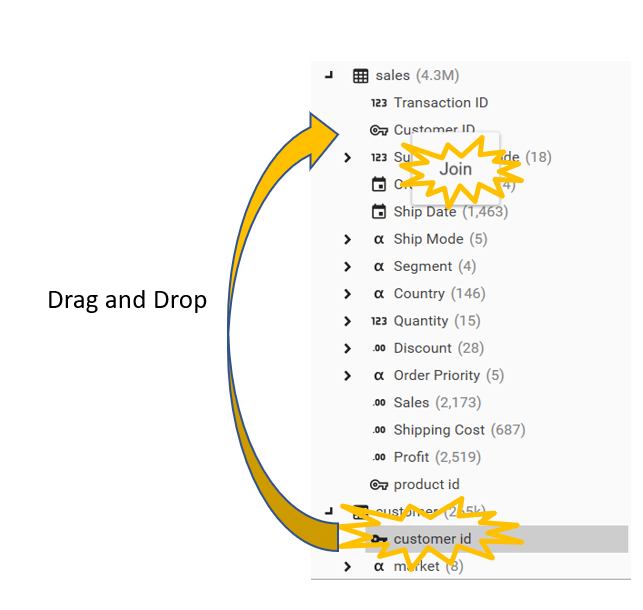
Consider using the Engineering | Joins dialog to create the join, as this will return an error message explaining why the join cannot be built.
Joining Sales and tProduct tables
Now we are going to create a join between the Sales and tProduct tables.
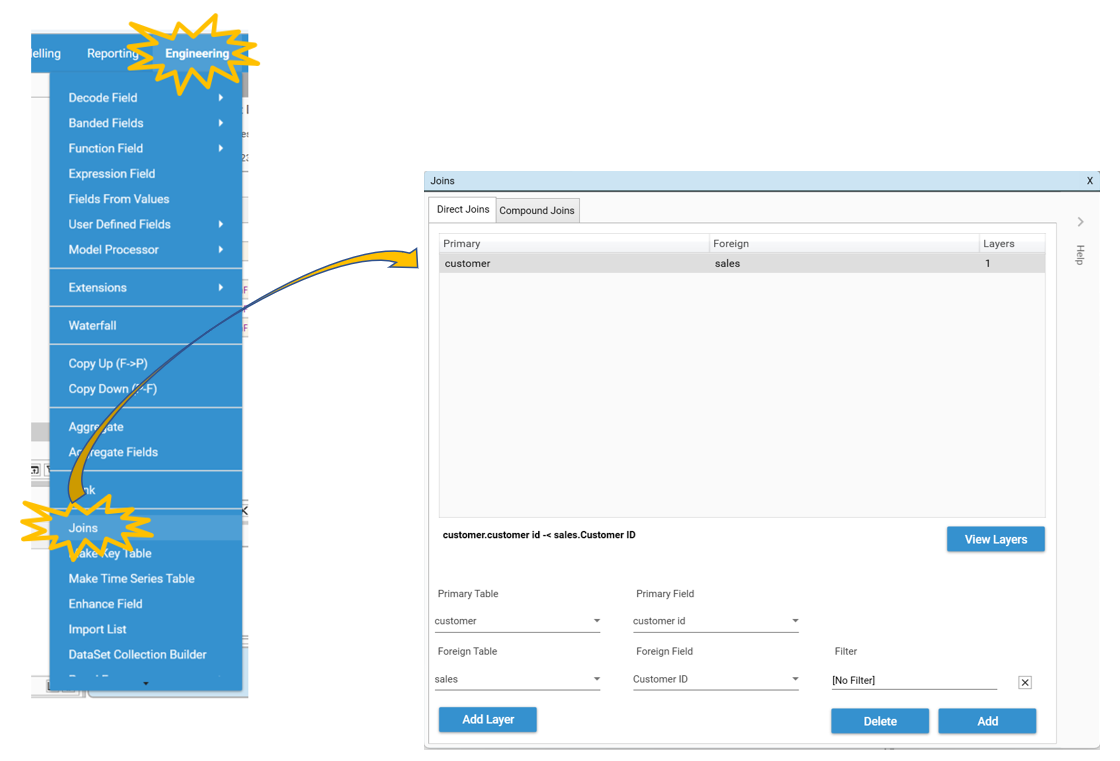
In this instance the tproduct table is the primary table and the sales table is the foreign table. This time we will use Engineering | Joins.
Open Engineering | Joins. The customer > sales join will be visible:
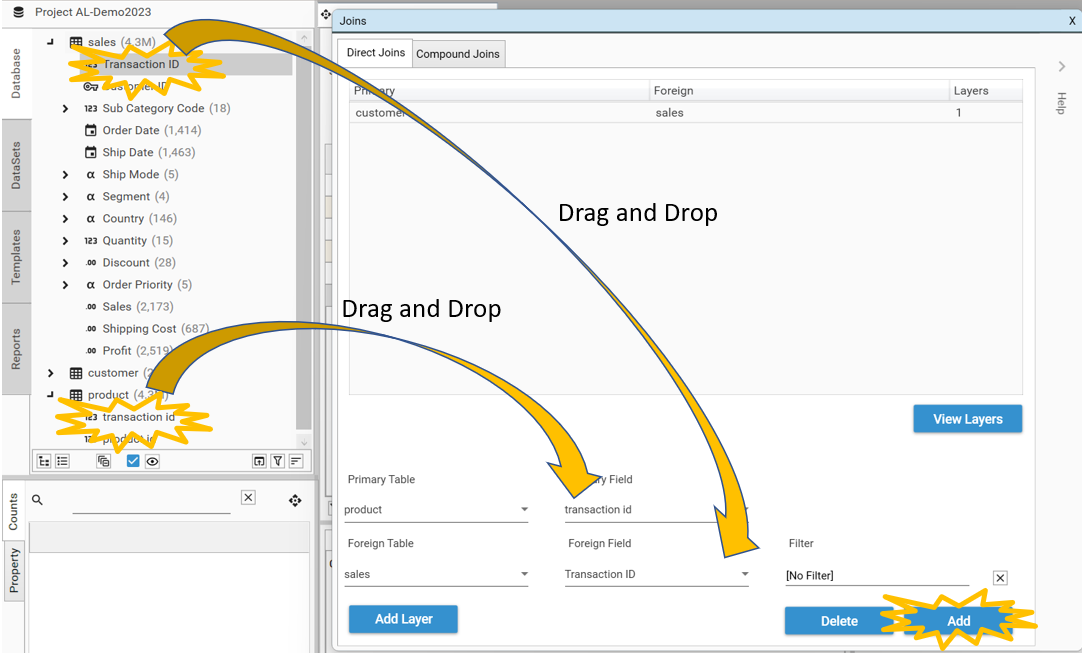
To create a new join between the Product and Sales tables:
- Drag and drop the tproduct.transaction id from the tproduct table into the Primary Field box.
- Drag and drop the sales.transaction id from the sales table and drop it into the Foreign Field box
- Select Add
- The new join will appear in the list of Direct Joins:
Copying Data from the Product Table to the Sales Table
Now that the tproduct and sales tables are joined, we can copy product information from the temporary tproduct table to the sales table. This will be required for later analysis.
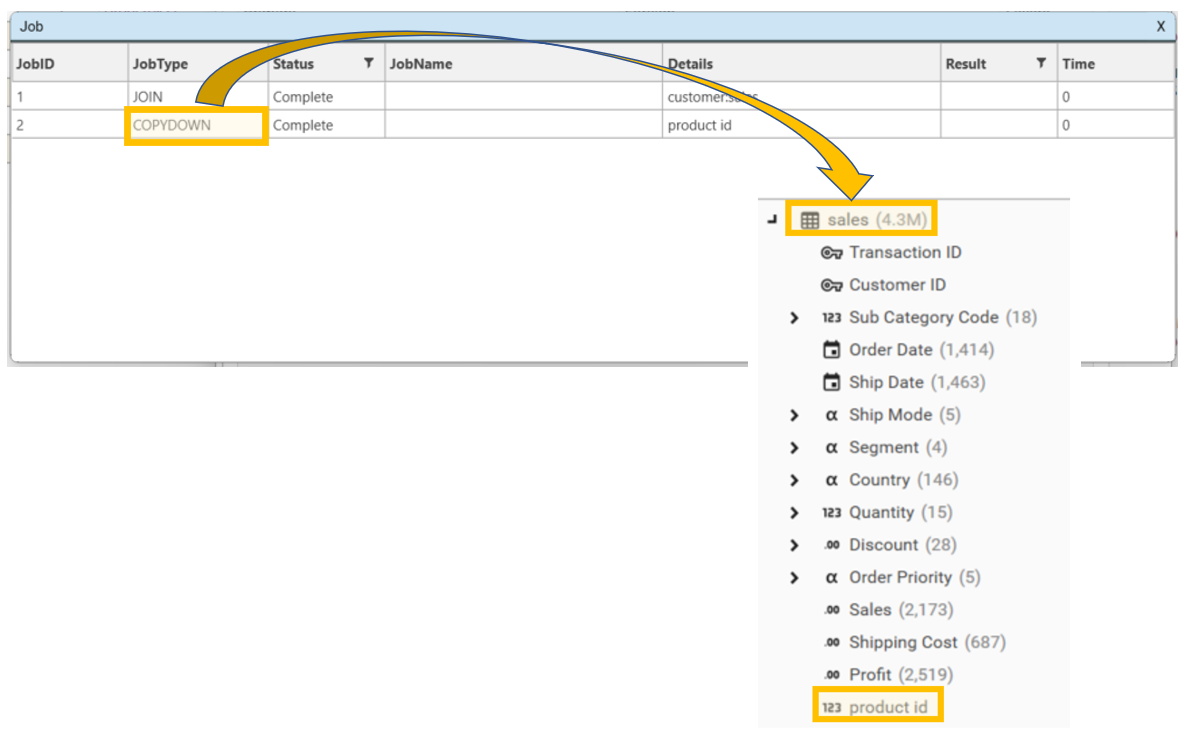
Drag tproduct.product id from the tproduct table and drop it on to the sales table and select Copy Down. The job window will appear with COPYDOWN as a task. Once this is complete (on the demo database this should complete almost instantly), product id will appear in the sales table.
Create Product Table from Sales Table Using Key Table
Delete temporary tproduct Table
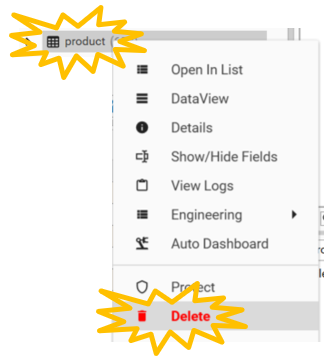
We no longer need the tproduct table as we have extracted the information we need from it. To delete it right click on tproduct and select Delete.
Creating a New Product Table From the Sales Table
We are now going to create a table of unique product ids from the sales table. This is known as "Creating a Key Table" and is a common action when preparing data for reporting or engineering.
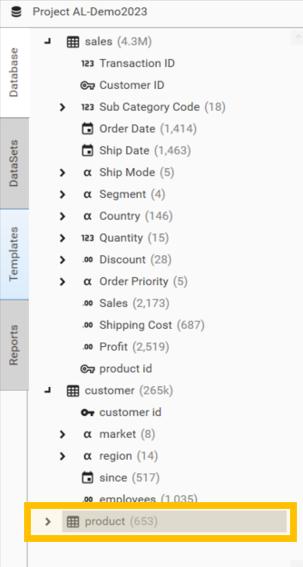
- Create Key Table takes a field from a source table, extracts all the unique values for that field, and creates a new table with a key field of the unique values. In the example here, the Key Field is product id.
- In the DjDemo2023 database there are 4.3m million records on the Sales table, and in those 4.3 million records, there are 653 unique product ids.
- Create Key Table will create a new table (in this case called product) with a key field called "product id". The product table will have 653 records in it - one for each unique product id in the source table.
To create a product table from a sales table right click on sales.product id hover over Advanced and select Make Key Table. 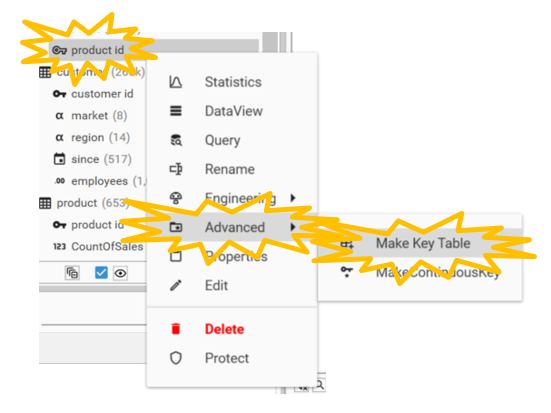
The Make Key Table dialog will appear. Unselect Auto Engineering as this is not necessary for our purposes. However leave Auto Join selected.
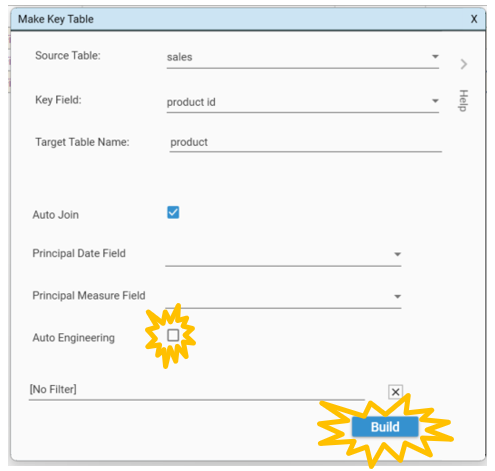
Select Build and a new product table will appear in the Project Explorer. This will be a table containing one record for each unique product id in the sales table.