NOTE
This article is part of the "Tutorial - Basic Sales Dashboard" series. See Dashboard - Introduction for a detailed overview of dashboard functionality.
Approach
When creating a dashboard, layout is key. This section shows how to create an empty dashboard and modify the layout to suit the visualisations that are going to be placed in it. When working on other dashboards, use the principles introduced here to create the required layout.
At the end of this step, you will know how to:
Create a Blank Dashboard
Design a custom Dashboard layout
Save and re-open a dashboard
Key Techniques
The following functional areas are introduced by this step:
Video Tutorial
Create Dashboard
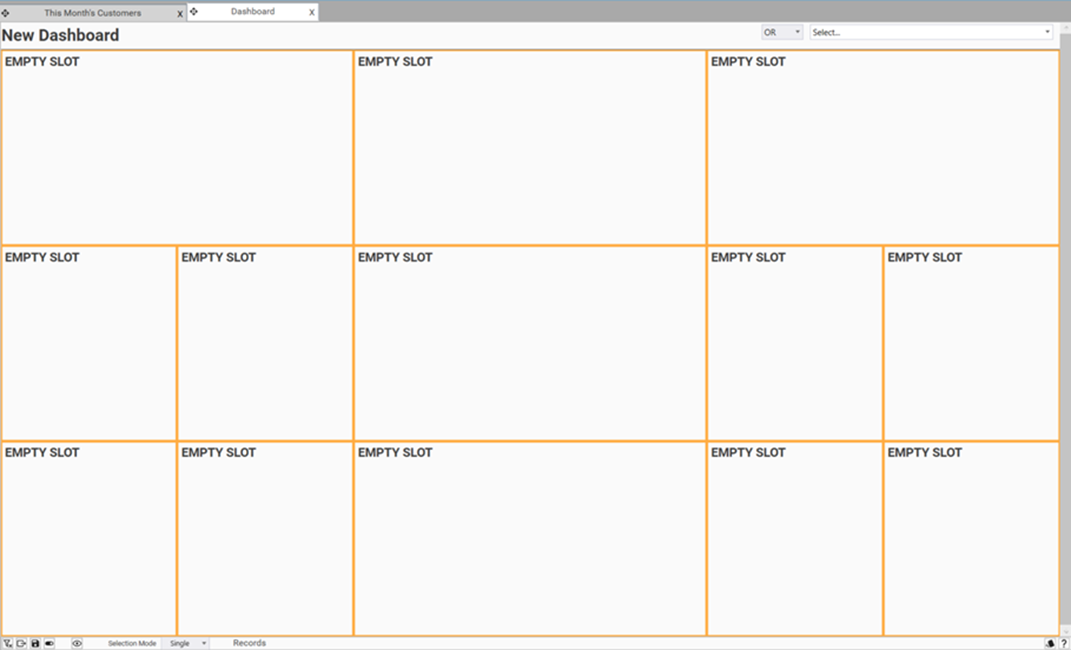
The finished sales dashboard will have 13 different “slots” for visualisations. Note the orange borders in the image below which shows the outlines of the slots:

Creating a Dashboard
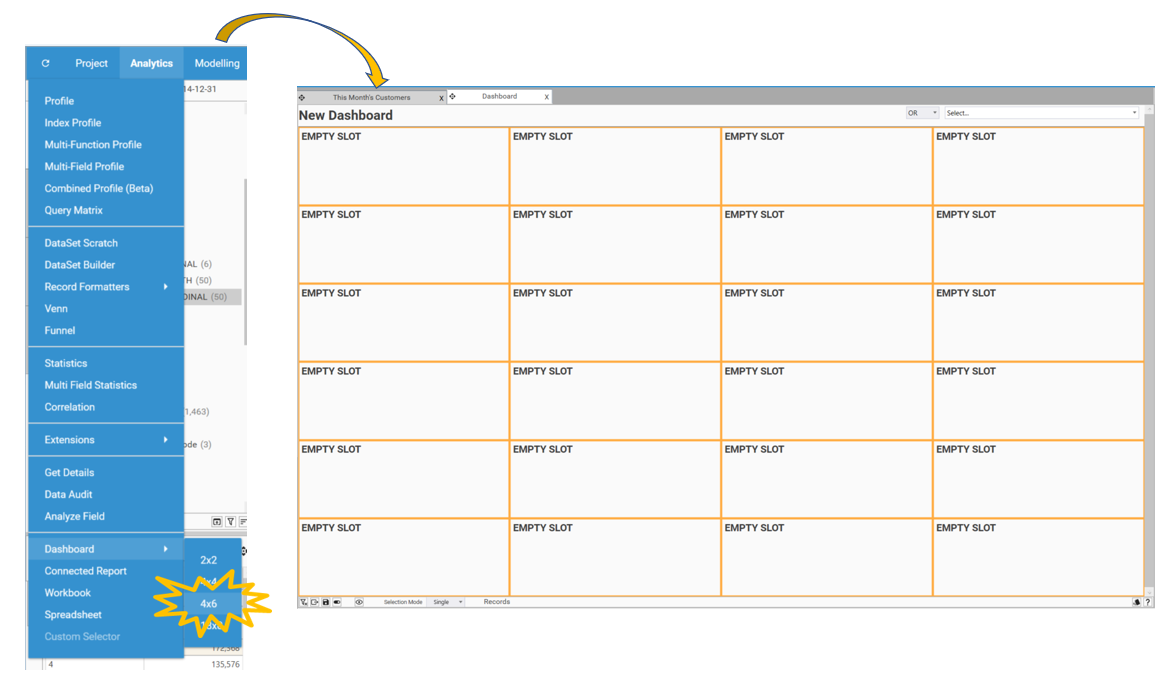
To create a dashboard go to Analytics | Dashboard | 4 X 6. (NOTE: For this dashboard, select the four by six dashboard as a starting point.)
Customise Dashboard
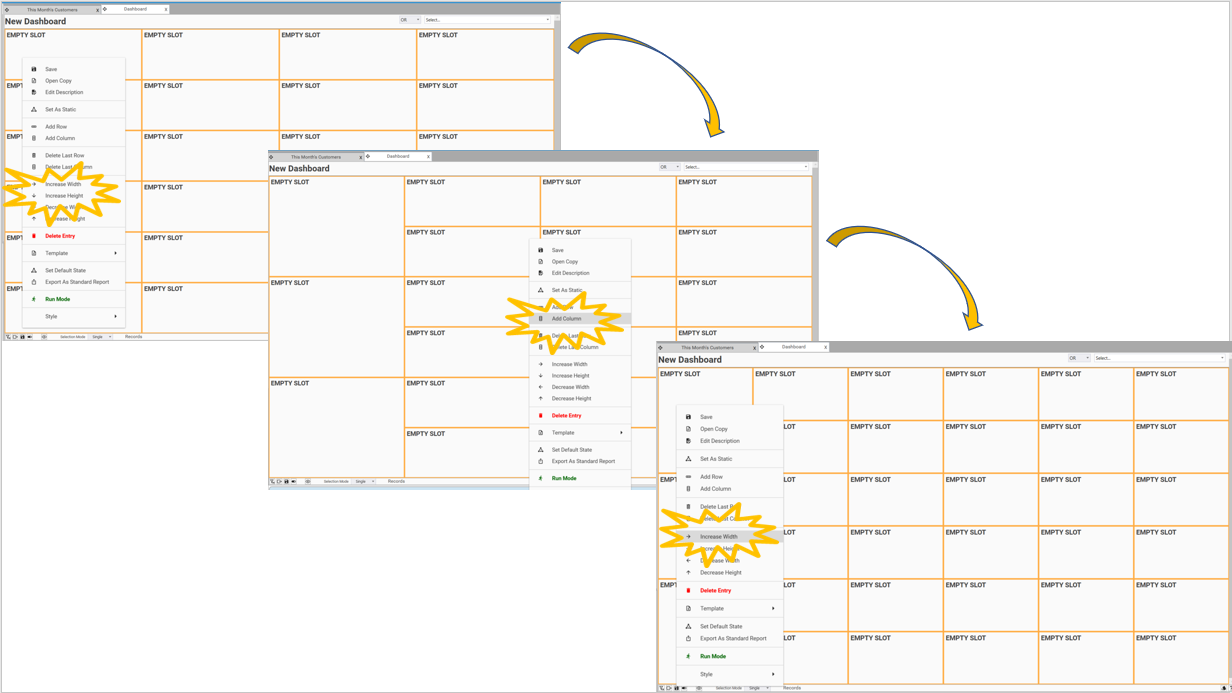
The height and width of slots in the dashboard, as well as the number of columns, can be changed by right clicking on the slot and selecting the desired option.
Add Columns
From the starting point of a 4×6 dashboard, two columns need to be added. Do this by:
right-clicking,
and selecting Add Column.
Do this twice.
Increase Height and Width
Increase Width
Increases the width of the current slot by one current width. Do this by:
right-clicking,
and selecting Increase Width.
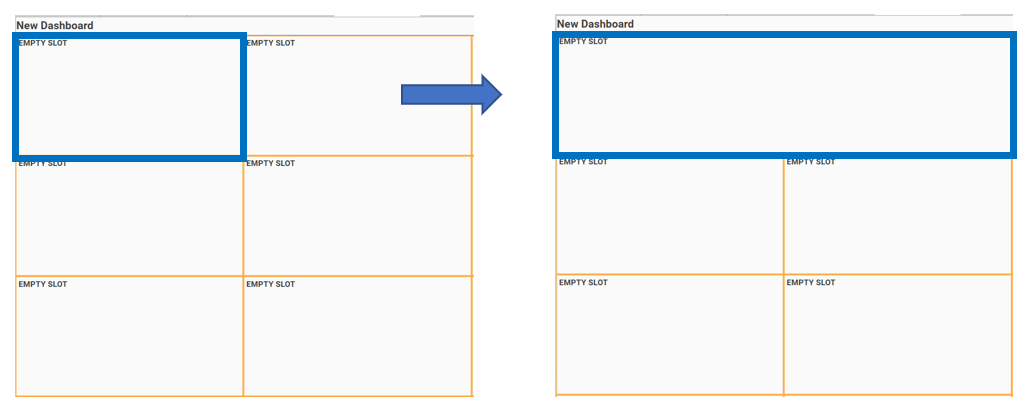
If the slot contains a dashboard component (i.e., a report), the component will be automatically resized with the slot. The width of a slot can only be increased into the space occupied by the slot immediately to the right of the active slot.
Increase Height
Increases the height of the current slot by one slot height. Do this by:
right-clicking,
and selecting Increase Height.
.png)
Final Dashboard layout
Keep editing your dashboard by increasing the height and width of slots as necessary, until it looks like the dashboard below.
Save Dashboard
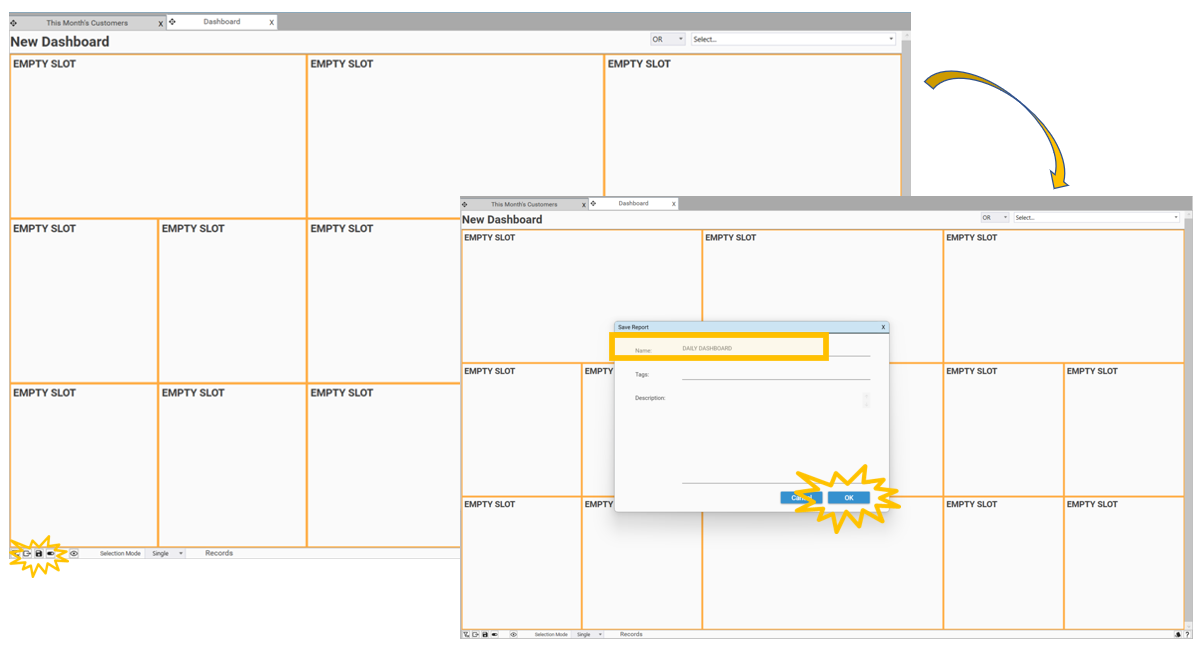
You can then save this dashboard template by clicking the save icon on the toolbar. The Save Report dialog will appear. Change the name of the report to DAILY DASHBOARD and select OK.
Opening a saved Dashboard
To open DAILY DASHBOARD:
go to Reports
expand Home
Drag and Drop DAILY DASHBOARD into the workspace.

Design/View Mode
When a saved Dashboard is opened it will be in view mode. To edit the dashboard put it into design mode by one of the following methods:
Right-click and choose “design mode”
Select the Toggle button.

NOTE: To see if a dashboard is in design mode confirm that individual slots have orange borders surrounding them.